Journal Article Submission Figures Workflow
After the blood, sweat, and tears is finished, and the article summarizing your wonderful research is ready to be submitted, well then there’s the submission process itself. Submitting articles to journals varies in difficulty with some allowing just a PDF of everything at once, and others requiring each table and figure to be uploaded as a separate file with sequential names. Frequently, images are best kept in a vector format for high-quality reproduction, and so this limits possible formats for uploading. And the final hurdle is that often the images are pasted (in context) into a MS Word document and so must be extracted for uploading to the submission engine.
So, starting from having an MS Word (docx) document with embedded vector format figures, here is a useful workflow to quicken things.
Extract Images
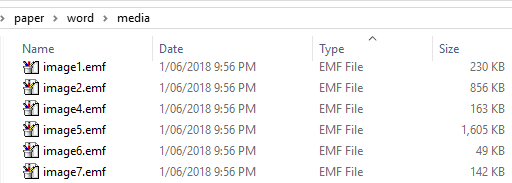
First copy the *.docx manuscript file for safety. Using F2 (or right-click and Rename) change the extension to *.zip. You’ll get a warning, but proceed. Docx files are really just zip files. Extract this zip file to a folder (say) /paper/. Traverse to ../paper/word/media/ and you can see all the images in the document. Some of these may be equations and so on, but the original format of the figures when pasted should distinguish these (e.g. *.emf for pasted images versus *.wmf for MS Word-generated images). Sorting by file type you should have something like this:
 Convert Images
Batch converting the images is obviously preferable than opening each in a PDF converter. The bees knees when it comes to image conversion is ImageMagick: it’s freeware and very powerful, but has a command line interface which might put some people off, but don’t let it! So assuming you have now installed this…
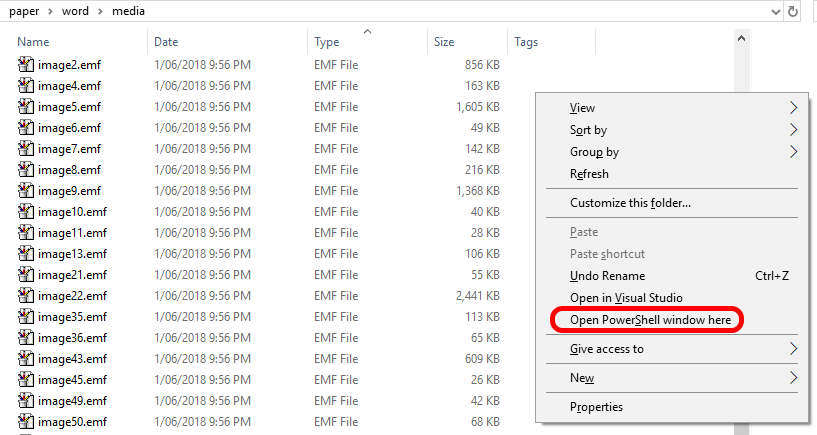
Still in the ../paper/word/media/ folder, holding down shift, right click on some white space and select Open PowerShell window here
Enter the command:
1 | mogrify --% -format pdf *.emf |
which converts all the *.emf files to *.pdf files keeping the same filenames. the --% is so that Powershell does not try to parse the following text, but passes it directly to the previous command, mogrify. Now you will have image2.pdf, image4.pdf and so on.
Sequential Numbering
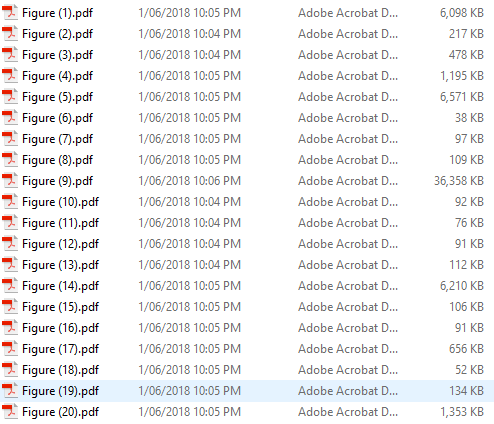
Finally, these PDF files now correspond (presumably) to Figure 1, Figure 2, and so on in the document. The next step is to rename image2.pdf, image4.pdf and so on to Figure 1.pdf, Figure 2.pdf, and so on. To do this, select all the PDFs and right click on the first one in the sequence and select Rename. Type “Figure” and press enter. Windows Explorer automatically recognizes that there will be multiple files with the same name and so labels them Figure (1).pdf, and so on. note that the ” (X)” is added to each filename (including leading space), where X is the index of the file.
With this, you should now have the PDFs named correctly, and read for copying back to the main folder and batch uploading. You can delete the ../paper/ folder now (original extracted from zip file).
With some further fancy PowerShell commands, the parentheses can be extracted from the filenames if necessary.
« Integrating LaTeXdiff with TeXStudio
Combining cross-references in MS Word »
Comment from Doug Jenkins
Time: 18 June, 2018, 09:43
It’s a bit amusing, to my mind, that in these days when AI is supposedly going to make us all redundant the day after tomorrow, we still have to do all this stuff to get an article published on paper 🙂
I really like ImageMagick. I haven’t done much with it recently, but a few years ago I looked at using it in combination with Excel to try and get my photo records under control. I really should get back to that!
Here’s a link to my Excel app calling ImageMagick:
https://newtonexcelbach.com/2012/09/28/daily-download-12-imagemagick-and-excel/